 This post is a holiday post and not what I normally post about. But I think it’s well worth the read as the cool tech should make up for missing F#/mobile apps content.
During the holidays, my wife got me a Google Home Mini Speaker! I also have a heat pump (A/C unit) that is connected to Wi-Fi, with an app. Unfortunately they both don’t talk to each other out of the box, so I thought a fun exercise would be for me to wire them up to talk to each other. The first step is to see if I can programatically control the heat pump.
Step 1: Talk to heat pump in code
A Google search turned up a javascript project, that appeared to do most of the required functions.
I tested it out locally via npm install and a node REPL, for some interactive coding.
After entering my credentials and trying out a few commands it appears the library works perfectly and achieve everything that I need. Here was the code for the first test:
1: 2: 3: 4: 5: 6: 7: 8: 9: 10: 11: 12: 13: 14: 15: 16: 17: 18: 19: | |
Step one is now complete.
Step 2: Make a simple Google Home app
Google has some great documentation on this with a tutorial. The tutorial will have you create an app called Silly Name Maker.
Most of the required setup uses the tool titled DialogFlow.
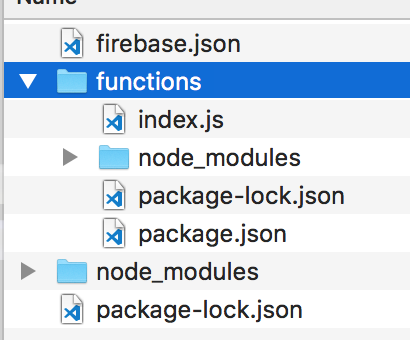
The tutorial creates a Google Assistant app that changes your name. The code is in Javascript and hosted with Google’s Firebase (Cloud Platform). I followed that tutorial and most things worked. There was one thing that I did have a problem with, which was that the firebase init method did not create the required files.
To get around this you can add a folder titled functions, and then create the two files in the folder index.js and package.json.
Step 3: Connecting the dots
It’s now time to update the cloud function to talk to the heat pump.
I left the intents the same as the Silly Name Maker app (I reused the code from the tutorial in Step 2), since that was not important at this stage.
For proof-of-concept I just wanted to do the simplest thing possible, by testing the architecture. So when the Firebase API is called, I hard-coded it set the heat pump to cool. This test will check that each component can talk to each other: ie DialogFlow -> Firebase -> Heat Pump.

The rest of the code was the same as the local test:
1: 2: 3: 4: 5: 6: 7: 8: 9: 10: 11: 12: 13: 14: 15: 16: 17: 18: 19: 20: 21: 22: 23: 24: 25: 26: 27: 28: 29: 30: 31: 32: 33: 34: 35: 36: 37: 38: 39: 40: | |
One thing that I noticed when locally testing out the heat pump controller (step 2) was that the session and cookies were saved locally (persistence is on by default). I did not want this to be done on the server, so I set this to be off when creating the controller on the server. To do this, an extra field persistence was set to false as follows:
1: 2: 3: 4: 5: | |
Time to do the test.
It Failed :(
Nothing happened. I found and checked the logs for Firebase. A connection exception was thrown and after a quick Google search, and I found out why. The error was due to the Firebase account being on a free tier, that restricts all external API calls. The next tier (that allows external API calls from Firebase) is $25/month which seems like a high price for a proof of concept (POC) A new plan is needed! So I decided to replace Firebase with Azure Functions
Step 4: Creating the Azure Function
I’ve used Azure functions a little bit before so it seems like the next logical step. Here’s the new plan to make this work.
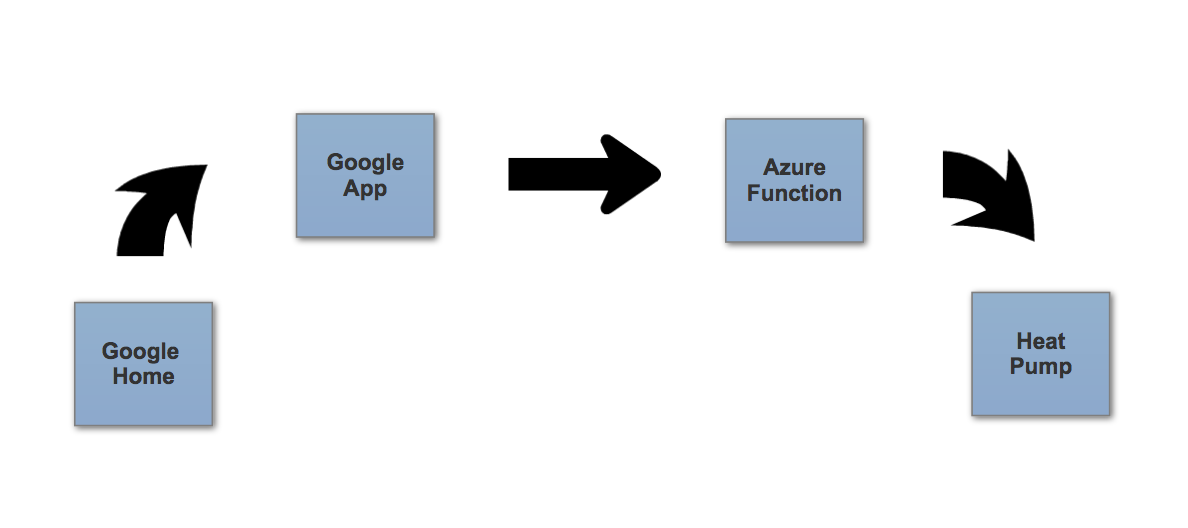 I thought this would be a simple copy and paste of the code, but there were a few details that I missed. Creating the function is not too hard (there are many other blog posts on this).
If you don’t have an Azure account, create one, for a free trial with $200 credit. For this Proof-Of-Concept, I don’t need the scaling features that Azure Functions offer, so I opted for a free service tier rather than a consumption plan (the consumption plan still gives you a number of API calls that are free, but will scale in event of demand). I created a Javascript Web-hook Function: 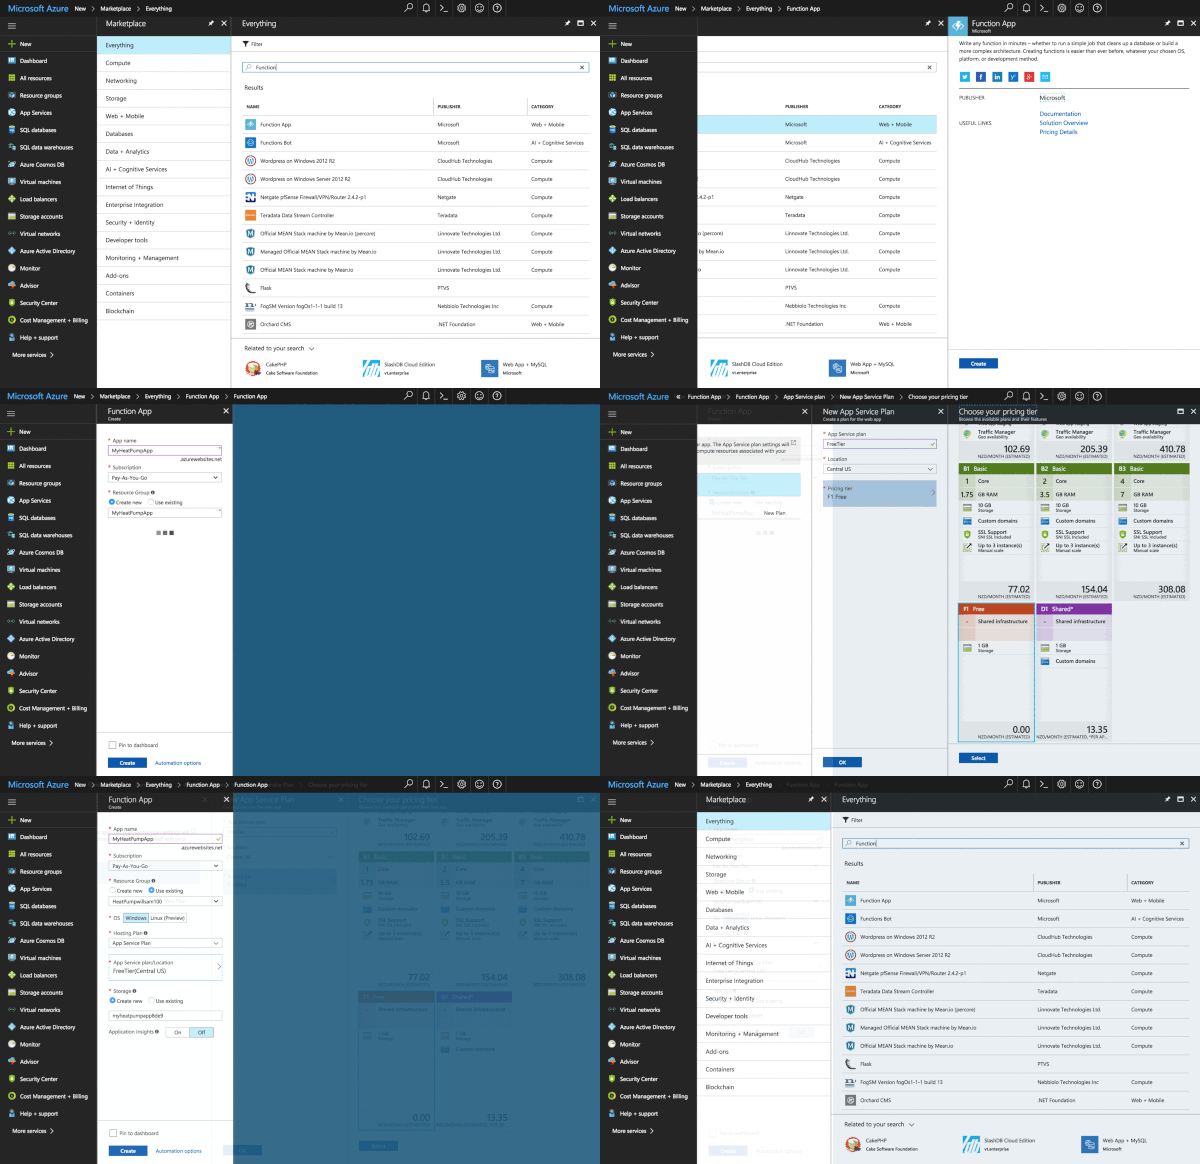 It’s now time to add the required bits and pieces to talk to the heat pump.
Step 5: Talking to the heat pump
I first tried to upload the package.json file (I thought I needed this, as I was planning to use the same libraries).
The first editor did not work that well, but I found the online editor, titled ‘App Service Editor’, that is much better (It looks like Visual Studio Code) 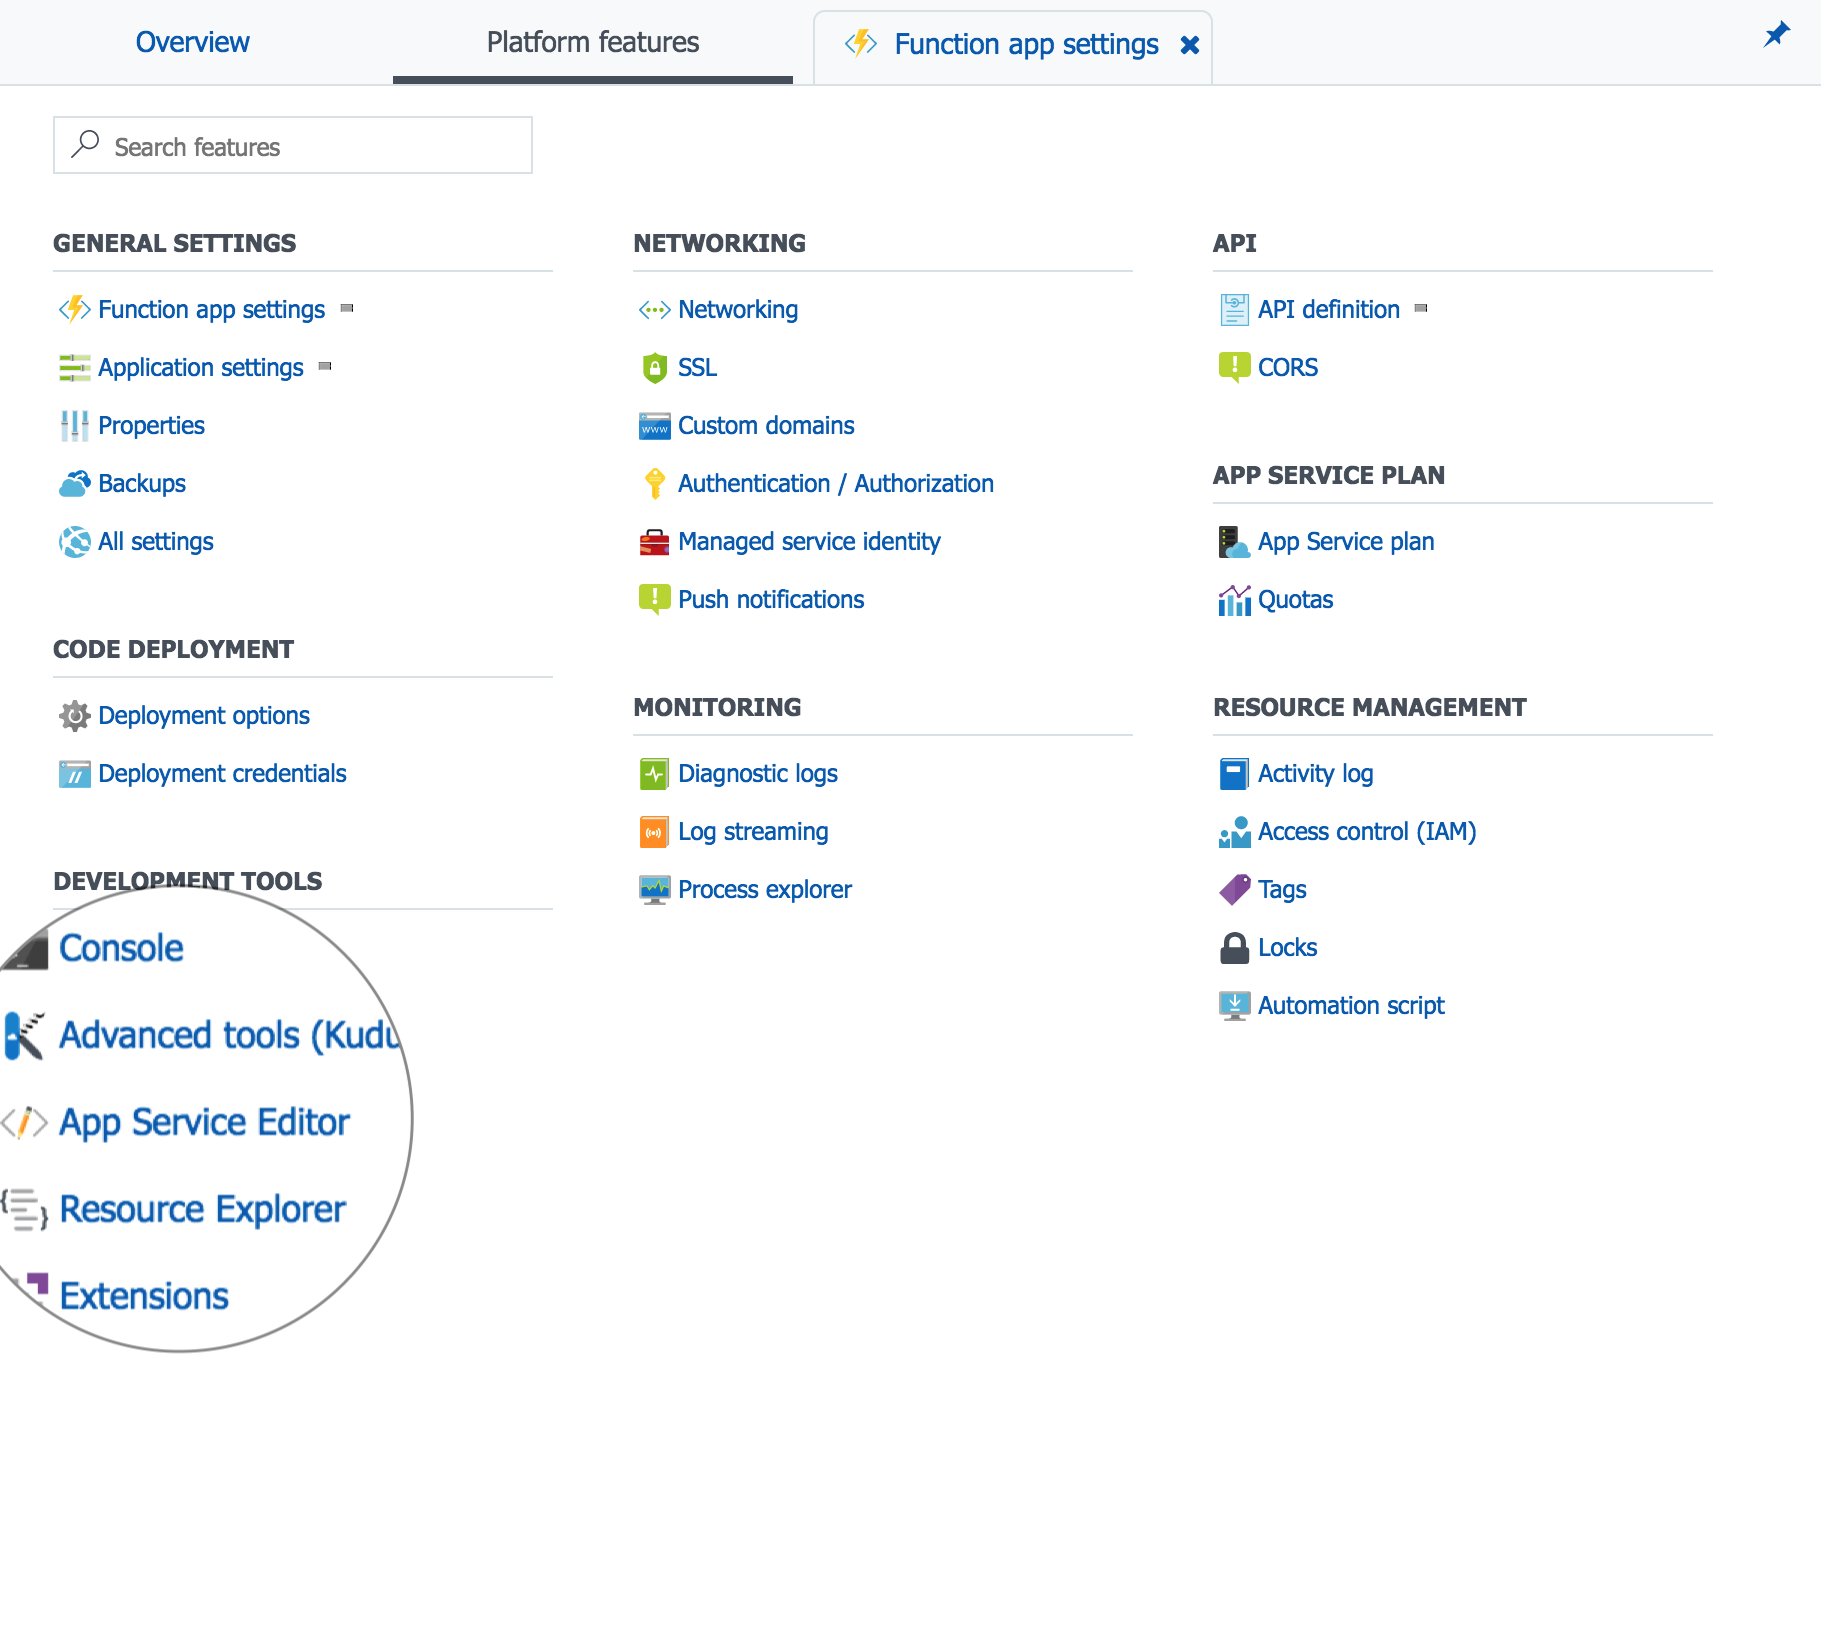
I was able to see the upload package.json file (and import the library), but it turned out that I didn’t need it. In the firebase example, an npm package was used with dialogue flow to parse the request and response. It was unclear how to use that with azure, and I didn’t want to figure it out.
All I needed was the structure of the response to continue. And the input data as well if the this step works.
At this stage, I only cared about sending the speech text in the response. I found the docs on how to send the response to Google for the speech.
1: 2: 3: 4: 5: 6: 7: 8: | |
I wrapped that in a function as follows:
1: 2: 3: 4: 5: 6: 7: 8: 9: 10: 11: 12: 13: 14: 15: | |
And then copying the code I had before, making the changes to set the response:
1: 2: 3: 4: 5: 6: 7: 8: 9: 10: 11: 12: 13: 14: 15: 16: 17: 18: 19: 20: 21: 22: 23: 24: 25: | |
With this, a test is now possible. Over the Google Assistant portal, fire off the request, and….
Success
The heat pump went from heat to cool.
Step 6: Handle Input
The last part is to handle input, and clean up the code a little bit. The docs contained the details of the input as well, though I just logged request, and then had a look for what I wanted. There were two things that I needed, the action and the parameters. Each could be pulled out of the request body as follows:
1: 2: | |
The action contains the string name of the action that was invoked in DialogFlow. I used this for different settings on the heat pump (e.g. one for power on/off, another action for the mode). The parameters contains a dictionary of names and values that were invoked on the action. For example, I had Mode with various values such as heat or cool. The result looked like this:
1: 2: 3: 4: 5: 6: 7: 8: 9: 10: 11: 12: | |
Step 7: Update DialogFlow with the intents and entities
Now that the Azure Function was in place, the last thing left was to update all the values in DialogFlow. Most of them were simple enough to fill out but there was one last part.
Updating the Intents
This was easy and was just a case of changing the strings. Here is what the final list of intents looks like: 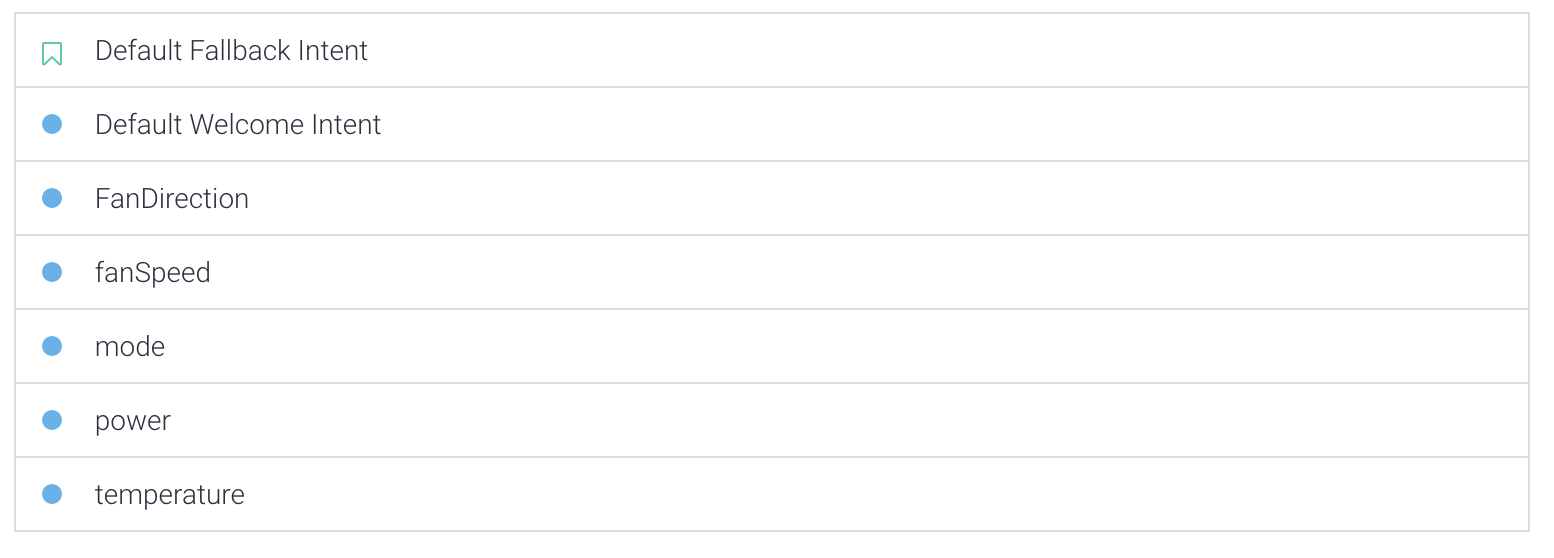 And here is the the details for the power intent. Note the enum type shown is explained next:
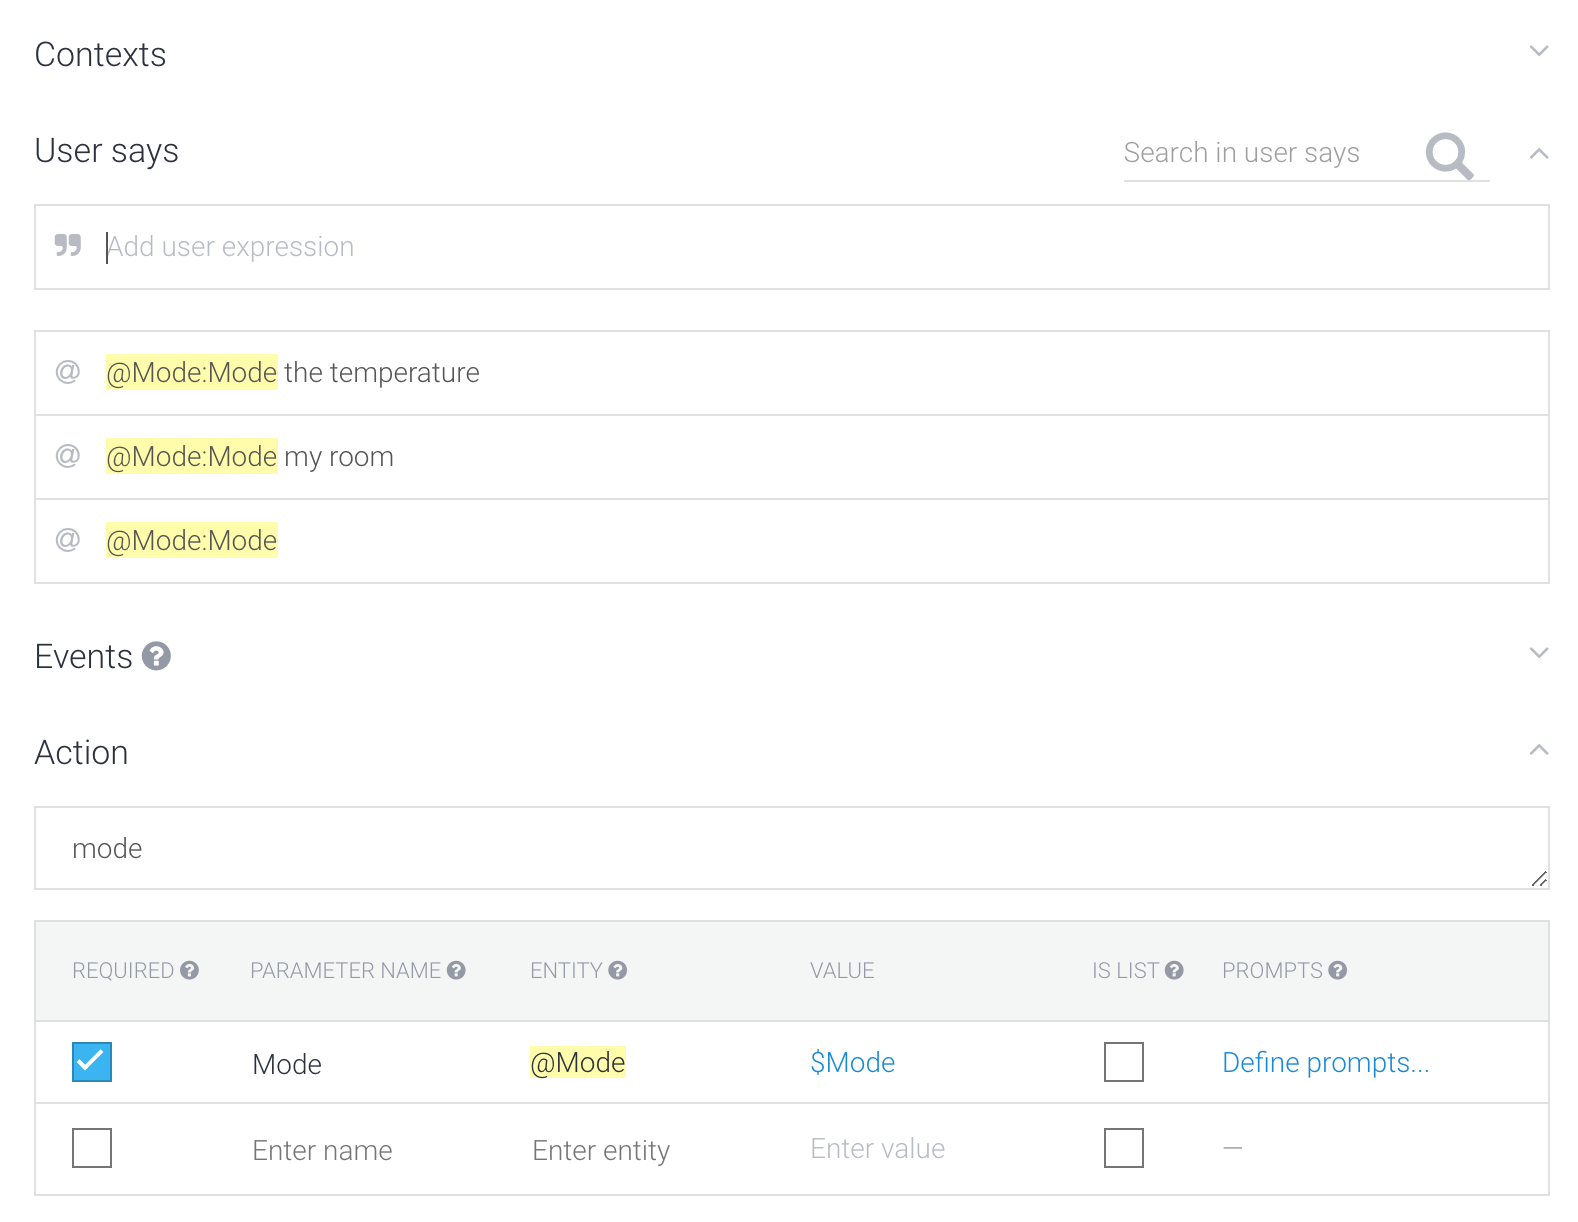
Defining enums
The Entities section of DialogFlow is for this, and it is really good. Create a name for the entity eg Mode and then give it some different values: Heat, Cool, Dry etc. I also found that you can defined synonyms. So for heat you can also say warm. Once all of the following, it was time for the final test. My Javascript skills were a little rusty (along with my typing/spelling), a few attempts latter and it was all working. 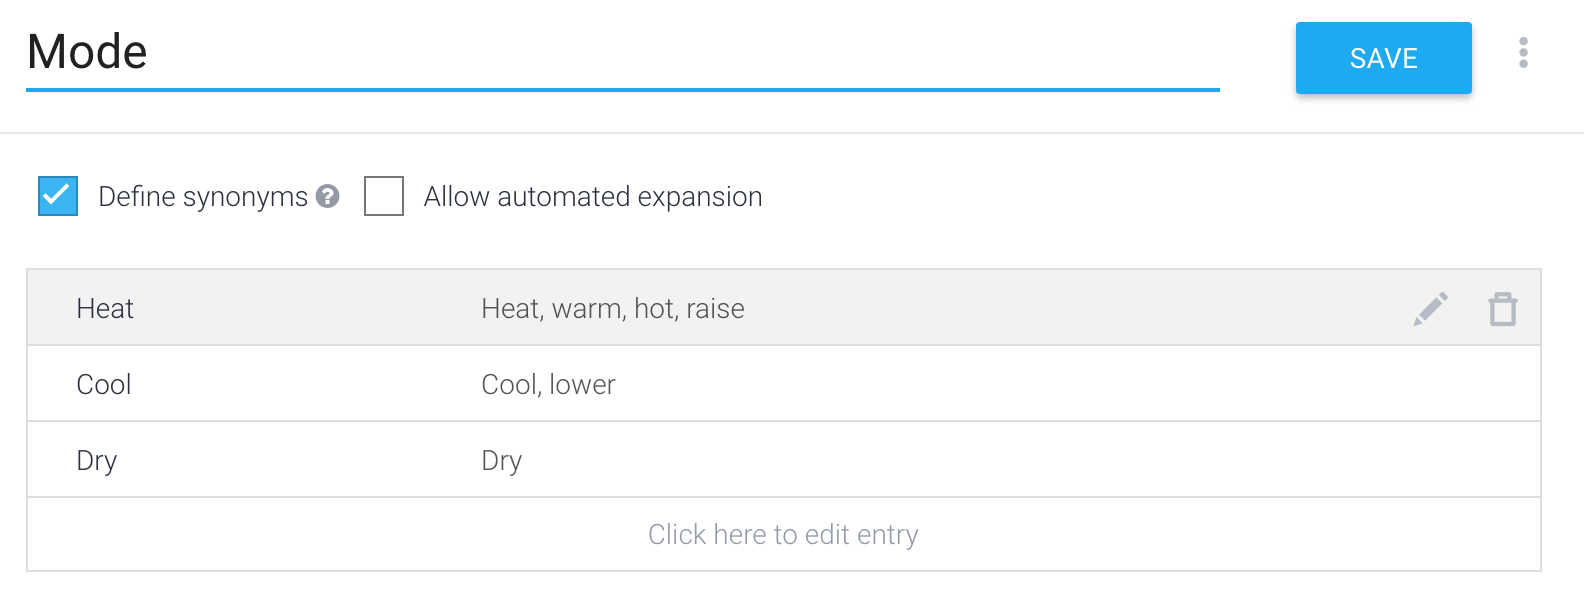
Wrap up
Change the name:
i got tired of saying Ok Google, talk to my test app all the time. So changed it. From DialogFlow click on integrations, and then click on Google Assistant. In the page that pops, it’s possible to update the information about the app, and change it’s name.
I changed mine to living room aircon. Note that it does not allow a single word for the name. It was now possible to say Ok Google, ask living room aircon to turn on in one sentence.